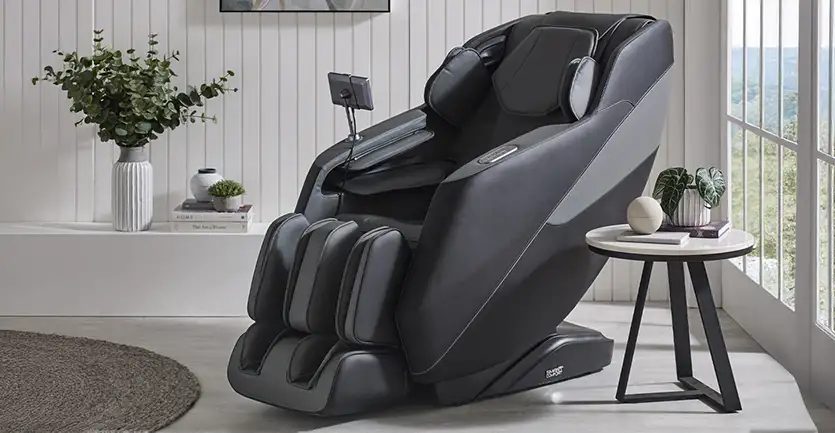

Ready to unlock everything your Eris Massage Chair has to offer? This guide will walk you through how to use your massage chair with confidence, helping you understand its features and get the most from every session.
We’ll start with a few essential tips that apply across our Smart Comfort massage chair range, before diving into the Eris’s individual features and controls later in the article. Whether you prefer a quick, effortless massage or like to fine-tune every setting, this guide has you covered.
Looking for instructions for a different model? You can find our full user guides below:
The Complete Aria Massage Chair User Guide
The Complete Luna Massage Chair User Guide
The Complete Rocco Massage Chair User Guide
Now, let's get started:
1. Get Comfortable
Start by kicking off your shoes and settling into your massage chair. For taller users, the footrest can be gently pushed out to extend as needed. It’s also a good idea to remove watches, jewellery or accessories before you begin, as this helps prevent anything catching on the upholstery during your massage.
2. Switch On
Compared to our other Smart Comfort massage chairs, the Eris has a more 'tablet-style' remote control is more intended to be held in place on its stand than in your hand. Press the power button at the bottom left to begin. The chair will take around 30-40 seconds to scan your body and detect your shoulder position, ensuring your massage is tailored to you for the best possible experience.
3. Relax and Enjoy
Settle your arms into the padded armrests and get ready for the massage program to start. If no adjustments are made, the chair will automatically start in Comfort Mode. Alternatively, you can explore the other massage programs outlined later in this guide and select the one that suits you best.
_______________________________________________
Eris Massage Chair: Complete User Guide
Basic Controls
 Power Button:
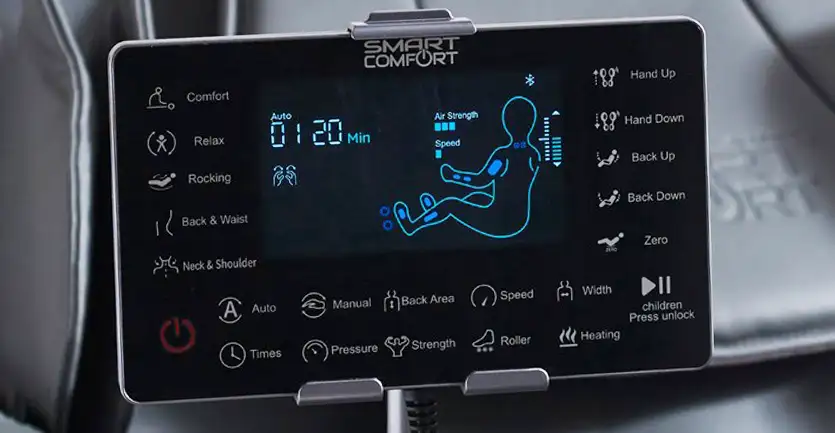
At the bottom left of the control panel is a red outlined power symbol - this is the power button. Press the power button to turn the chair on and allow it a moment to start up. Over the next 30-40 seconds, the chair will perform a brief body scan to identify your shoulder position and ensure everything is aligned correctly. Once complete, use the remote to choose your preferred massage program.
Not sure where to begin? The Aria makes it easy. If no settings are selected after start-up, the chair will automatically begin in Comfort mode so you can sit back, relax, and let it do the work.
Auto Button:
If you'd like to select your own program right away, you can press one of the quick keys above the Power Button, labelled as follows: Comfort, Relax, Rocking, Back & Waist, and Neck & Shoulder. Simply press one of these to begin the corresponding mode, or you can also press the Auto button just below these buttons to cycle through the remaining automatic modes. The currently selected automatic mode is displayed at the top left of the display screen, as "Auto 01", "Auto 02", etc depending on which mode is currently active.
The available modes are:
• Comfort (Auto 01) is a gentle mode that targets the whole body
• Relax (Auto 02) focuses mainly on lower back, legs & feet
• Rocking (Auto 03) provides a gentle front stretch by lightly pulling feet down, and reclining backward
• Back & waist (Auto 04) focuses on the back & waist areas
• Neck & shoulders (Auto 05) focuses on the shoulder & neck areas
• Full Body (Auto 06) is an all-over, full body program
• Spine Care (Auto 07)
• Fatigue Recovery (Auto 08)
• Meridians (Auto 09)
• Hips & Thighs (Auto 10)
• Soothing Sleep (Auto 11)
• Leisure Health (Auto 12)
Times Button:
Directly underneath the Auto button is the Times button. Pressing this adjusts the duration of the current massage program by 5-minute increments, up to a maximum of 30 minutes at a time. The remaining time is shown in the top left of the display screen, just to the right-hand side of the Auto mode indicator.
Play/Pause & Child Lock Button:
On the bottom right of the control panel is a play/pause symbol similar to what you'll see on media player apps. Pressing this once will pause the current massage operations, and pressing again will resume them. If you press and hold the button for 3 seconds, the other buttons will be locked to prevent accidental presses. Hold again for 3 seconds to unlock the controls.
_______________________________________________
Chair Position Controls
 For adjusting the recline angle of the chair, we have the Chair Position Controls.
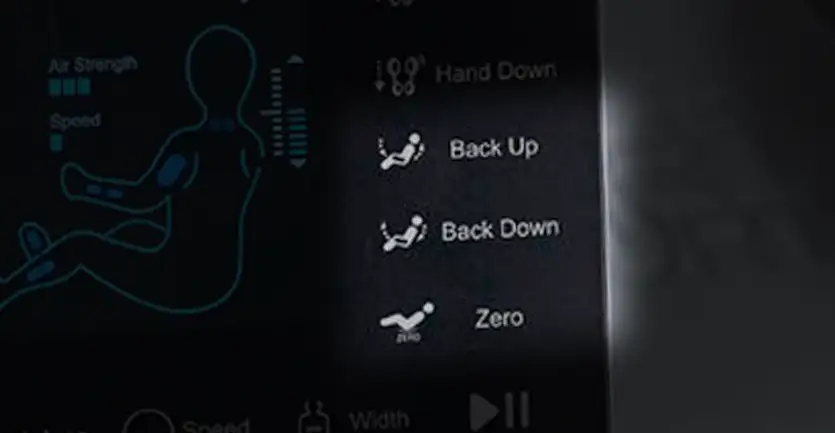
Back Up Button:
Use the Back Up button to raise the backrest up and the footrest down, or upright the chair.
Back Down Button:
The Back Down button does the opposite, reclining the chair backward and raising the footrest up. You can press and hold either of the Back Up or Back Down buttons to fine tune to recline angle.
Zero Button:
The Zero button will move the chair into horizontal, zero-gravity recline position with just a press (no need to hold the button down.) You can press again to cycle through 3 different levels of zero-gravity recline.
_______________________________________________
Manual Mode & Adjustment Controls
Manual Mode:
 For those who desire more control over their massage experience, the Manual Controls are available to fine tune settings further.
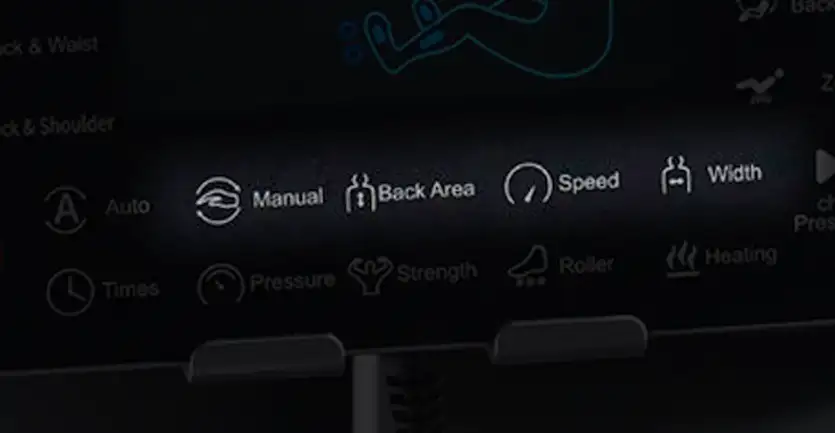
Below the LCD screen are the following manual control buttons:
Manual Button:
The manual button cycles between the massage or movement technique that the rolling massage wheels in the backrest will use. Choose between kneading, beating, kneading & patting, shiatsu or knocking.
The currently selected massage technique is indicated by a diagram of hands on the left hand side of the display screen:

Back Area Button:
The back area button adjusts the travel distance settings of the massage wheels in the backrest, and the current setting is indicated by the letter H followed by a number on-screen (H1, H2, etc). The movement settings are as follows:
H1: the massagers stay fixed in place while operating
H2: the massagers move up and down the backrest a short distance (the area can be adjusted)
H3: the massagers move up and down the full length of the backrest
H4: the massagers move up and down a short distance over the upper back only
H5: the massagers move up and down a short distance over the lower back only
Speed Button:
The speed button toggles between 5 speed levels of the massage wheels in the backrest during all techniques (see manual button above) - except for kneading technique, which only has a fixed speed.
Width Button:
The width button adjusts the horizontal width between the massage wheels in the backrest during beating, shiatsu and knocking techniques. There are 3 width options.
Adjustment Controls:
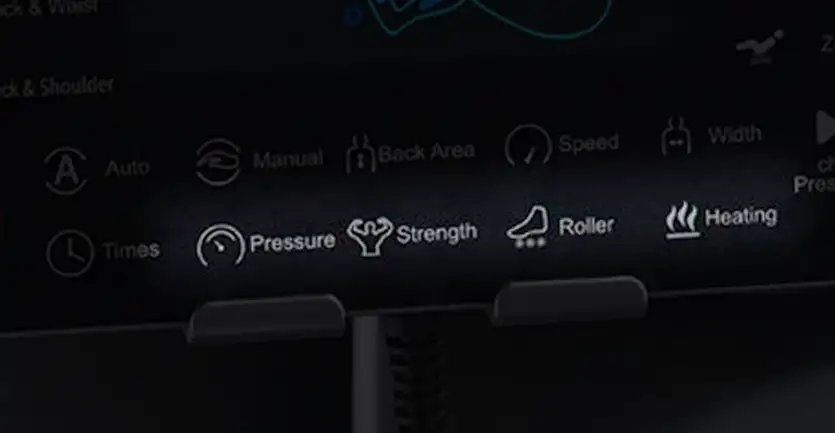 Beneath the first row of manual controls is a row of further adjustments that can be made. The Pressure, Strength, Roller and Heating settings can be adjusted during manual operating, and also during most automatic modes. The settings are as below:
Pressure Button:
The pressure button cycles between three airbag pressure settings; full body airbags, upper body airbags or lower body airbags. This is not adjustable during automatic modes as they have pre-programmed airbag cycles.
Strength Button:
The strength button adjusts the airbag pressure strength between five intensity settings.
Roller Button:
The roller button cycles between three settings for the foot rollers; low, medium, high and off.
Heating Button:
The heating button toggles between backrest heating, calf heating, or off. Allow 3 minutes to reach maximum heat.
_______________________________________________
Bluetooth Audio
To play music or other audio through the Bluetooth speakers, go to the Bluetooth settings menu on your phone or device. Search for a new device, look for “SMART COMFORT” or similar and choose ‘connect’ or ‘pair’. You can then play music, podcasts or audiobooks using your regular media player app.
_______________________________________________
Armrest Control Panel
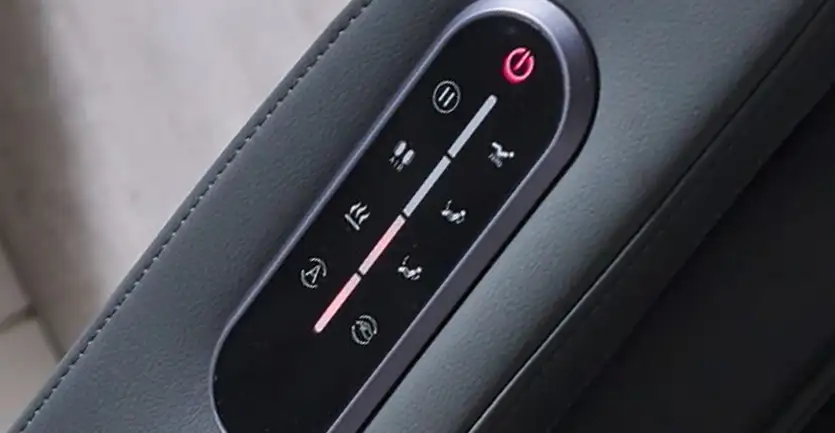 Sometimes, you just want to be able to quickly adjust a setting without reaching out for the remote control. The armrest quick buttons are perfect for this. Starting at the top of the panel with the power button and moving clockwise, the other buttons are as follows:
Power Button:
Used to power the chair on and off.
Zero Gravity Button:
Toggle between the 3 Zero-Gravity, horizontal recline positions.
Back Down Button:
The Back Down button does the opposite, reclining the chair backward and raising the footrest up. You can press and hold either of the Back Up or Back Down buttons to fine tune to recline angle.
Back Up Button:
Use the Back Up button to raise the backrest up and the footrest down, or upright the chair.
Technique Button:
Works the same as the Manual Button on the main remote control, cycling between the massage or movement technique that the rolling massage wheels in the backrest will use. Choose between kneading, beating, kneading & patting, shiatsu or knocking.
Heating Button:
Press to turn heating functions on or off.
Air Pressure Button:
Press to cycle through airbag options, or off.
Pause Button:
Press to pause all massage functions, and press again to resume.
---
And with that, you have our complete guide to operating the Eris Massage Chair. Sit back, relax, and have a play with all of the options at your disposal and you'll have your new favourite settings in no time.
Enjoy!


